Creating a homemade projector with a mirror is a fun and creative DIY project that allows you to magnify and project images or videos from a smartphone or screen onto a larger surface. Here's a simplified guide to making a basic homemade projector using a magnifying glass or a lens and a mirror:
Materials Needed:
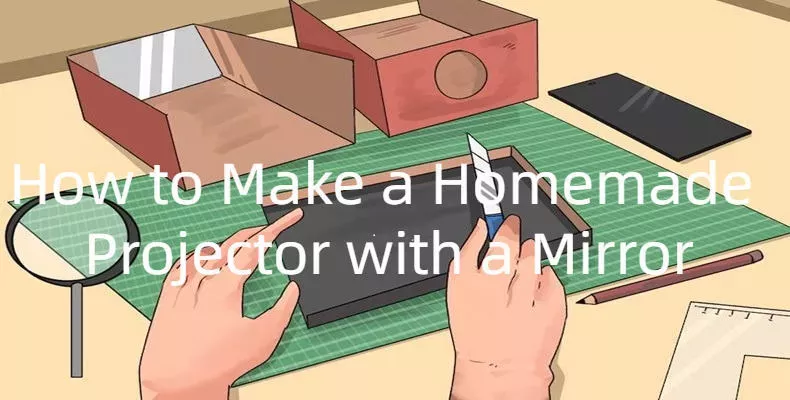
- Shoebox or cardboard box
- Magnifying glass or lens
- Small mirror
- Box cutter or scissors
- Tape
- Smartphone or laptop with the content you want to project
- Dark paper or paint (optional, for light blocking)
Steps to Make a Homemade Projector with a Mirror:
-
Prepare the Box:
- Take your shoebox or cardboard box and cut out a rectangular hole on one side. This will be the side where you will project the image.
-
Set up the Reflective Surface:
- Place the small mirror at a 45-degree angle inside the box, facing the magnifying glass or lens. The mirror will reflect the image received from the magnifying glass/lens.
-
Attach the Magnifying Glass or Lens:
- Position the magnifying glass or lens at the end of the box opposite the side with the hole. This will be where you place your smartphone screen facing downwards to project the image.
-
Test the Projection:
- Place your smartphone or laptop at the end of the box with the magnifying glass or lens, facing downwards. Adjust the distance between the screen and the lens until the image comes into focus on the projection side of the box.
-
Fine-tune the Image:
- To adjust the size and focus of the projected image, you can move the phone closer or farther away from the lens, or adjust the angle of the mirror slightly.
-
Block Out Excess Light (Optional):
- To improve the quality of the projected image, you can use dark paper or paint to cover any gaps or areas where excess light may enter the box and disrupt the projection.
-
Project Content:
- Turn on your smartphone or laptop and play the content you wish to project. Position it correctly in the box and adjust the focus as needed until you achieve a clear and sharp image on the projection side.
-
Enjoy Your Homemade Projector:
- Once you have set up and fine-tuned your homemade projector, find a darkened room and enjoy projecting your favorite videos, images, or presentations onto a larger surface such as a wall or screen.
This DIY projector is a basic setup that can be improved and customized based on available materials and desired image quality. Experiment with different setups and adjustments to enhance the projection quality and create a unique viewing experience.
Tools Needed for a Homemade Projector
Creating a homemade projector can be an enjoyable DIY project that allows you to amplify and project images or videos onto a larger surface. Here is a list of tools and materials you may need to construct a basic homemade projector:
Tools Needed:
-
Cardboard Box or Shoebox: This will serve as the main structure of the projector.
-
Magnifying Glass or Lens: Used to magnify and project the image from the screen onto a larger surface.
-
Small Mirror: Positioned at a 45-degree angle to reflect the image received from the magnifying glass/lens.
-
Box Cutter or Scissors: Used to cut openings in the cardboard box for the screen, lens, and mirror.
-
Tape: To secure the components in place and seal any gaps in the box to prevent light leakage.
-
Smartphone or Laptop: To display the content you want to project onto the screen.
-
Dark Paper or Paint (Optional): Helps block out excess light to improve the quality of the projected image.
-
Ruler or Measuring Tape: To ensure precise measurements and alignment of components within the box.
-
Marker or Pencil: To mark cutting lines and positioning of components on the cardboard.
Optional Tools for Advanced Projects:
- Heat Gun or Glue Gun: Used to secure components or create a more permanent structure.
- Wood or Plastic Frame: For a more durable and aesthetic design.
- Paint or Decorative Materials: To customize and decorate the projector box.
- Tripod or Stand: To stabilize and position the projector at the desired angle.
These tools are basics for constructing a simple homemade projector using a magnifying glass or lens and a mirror to project images from a screen onto a larger surface. Additional tools and materials can be incorporated based on the complexity and features you wish to include in your homemade projector project. Customize your projector design based on available resources, creativity, and the desired quality of the projected images or videos.
Steps to Make a Homemade Projector
Creating a homemade projector can be a fun and educational DIY project. Below are steps to make a simple projector using a smartphone, a magnifying glass, and a few other materials:
Materials Needed:
- Shoebox or cardboard box
- Magnifying glass or lens
- Smartphone or tablet
- Tape
- Scissors or box cutter
- Marker
- Ruler
- Dark paper or fabric (optional)
- Small tripod or makeshift stand (optional)
Steps to Make a Homemade Projector:
-
Prepare the Shoebox:
- Cut a rectangular hole on one side of the shoebox large enough to fit the magnifying glass or lens. This opening will be the projector lens.
-
Position the Lens:
- Place the magnifying glass or lens at the opening you made. Secure it in place using tape so that it does not move.
-
Create a Smartphone Stand:
- Position your smartphone or tablet inside the box on the opposite side of the lens. You may need to prop up the device so that the screen faces the lens at the appropriate angle. You can use a small tripod or a makeshift stand for this purpose.
-
Adjust the Distance:
- Move the smartphone back and forth until the image appears in focus on the projection surface (e.g., a wall or a screen).
-
Secure the Smartphone:
- Once you have found the correct focus distance, use tape or the makeshift stand to secure the smartphone or tablet in place.
-
Optional Light Blocker:
- To improve the image quality, cover any gaps or areas around the lens with dark paper or fabric to block out excess light.
-
Adjust Brightness and Focus:
- Adjust the brightness and focus on your smartphone or tablet to optimize the projected image quality.
-
Darken the Room:
- For better results, use the projector in a darkened room to enhance the clarity and brightness of the projected image.
-
Project the Image:
- Play a video or display images on your smartphone screen. The image should be projected through the lens onto the projection surface.
-
Enjoy Your Homemade Projector:
- Sit back, relax, and enjoy your homemade projector. Experiment with different settings and adjustments to improve the quality of the projected image.
This homemade projector setup is a basic design that you can further customize and enhance based on available materials and your desired level of complexity. Have fun with the project and explore different ways to improve and innovate your DIY projector setup.
[Must know] Tips for Using a Homemade Projector
When using a homemade projector, there are several important tips to keep in mind to ensure the best possible performance and experience. Here are some "must-know" tips for using a homemade projector effectively:
-
Optimal Lighting Conditions:
- Choose a dimly lit or dark room for the best projection results. Excess light can wash out the projected image, reducing visibility and image quality.
-
Adjust Focus and Distance:
- Fine-tune the focus of the projection by adjusting the distance between the lens and the projection surface. Experiment with different distances until you achieve a clear and sharp image.
-
Image Quality:
- The image quality of a homemade projector may not match that of commercial projectors. Understand the limitations of your setup and manage your expectations accordingly.
-
Stable Setup:
- Ensure that your homemade projector setup is stable and secure to prevent accidental movements that can disrupt the projection alignment.
-
Regular Maintenance:
- Check and clean the lens and mirror regularly to remove dust or debris that could affect the image quality.
-
Cooling:
- Homemade projectors can generate heat. Allow for adequate ventilation to prevent overheating during prolonged use.
-
Use External Speakers:
- For better audio quality, consider connecting external speakers to your device for a more immersive viewing experience.
-
Positioning of Source Device:
- Position the source device (smartphone, tablet) correctly within the projector box to ensure that the image is aligned properly for projection.
-
Content Display:
- Use high-quality images and videos for the best viewing experience. Lower-resolution content may appear pixelated when projected.
-
Avoid Interruptions:
- Minimize movement or disruptions in the room during projector use, as this can affect the quality of the projected image.
-
Experiment and Learn:
- Experiment with different settings, adjustments, and materials to improve the image quality and overall performance of your homemade projector setup.
-
Safety Precautions:
- Be cautious when handling the homemade projector components, especially if there are sharp edges or hot surfaces. Ensure that children are supervised when using the projector.
By following these tips, you can optimize the performance of your homemade projector and enjoy a better viewing experience. Remember that homemade projectors are for fun and educational purposes and may not match the quality of commercial projectors, so adjust your expectations accordingly.